
Composting at Home: The Complete Picture from Kitchen Scraps to Garden Bed
Composting reduces waste and builds better soil for free. A thorough walkthrough of how it works, what to add, and how to avoid common pitfalls.
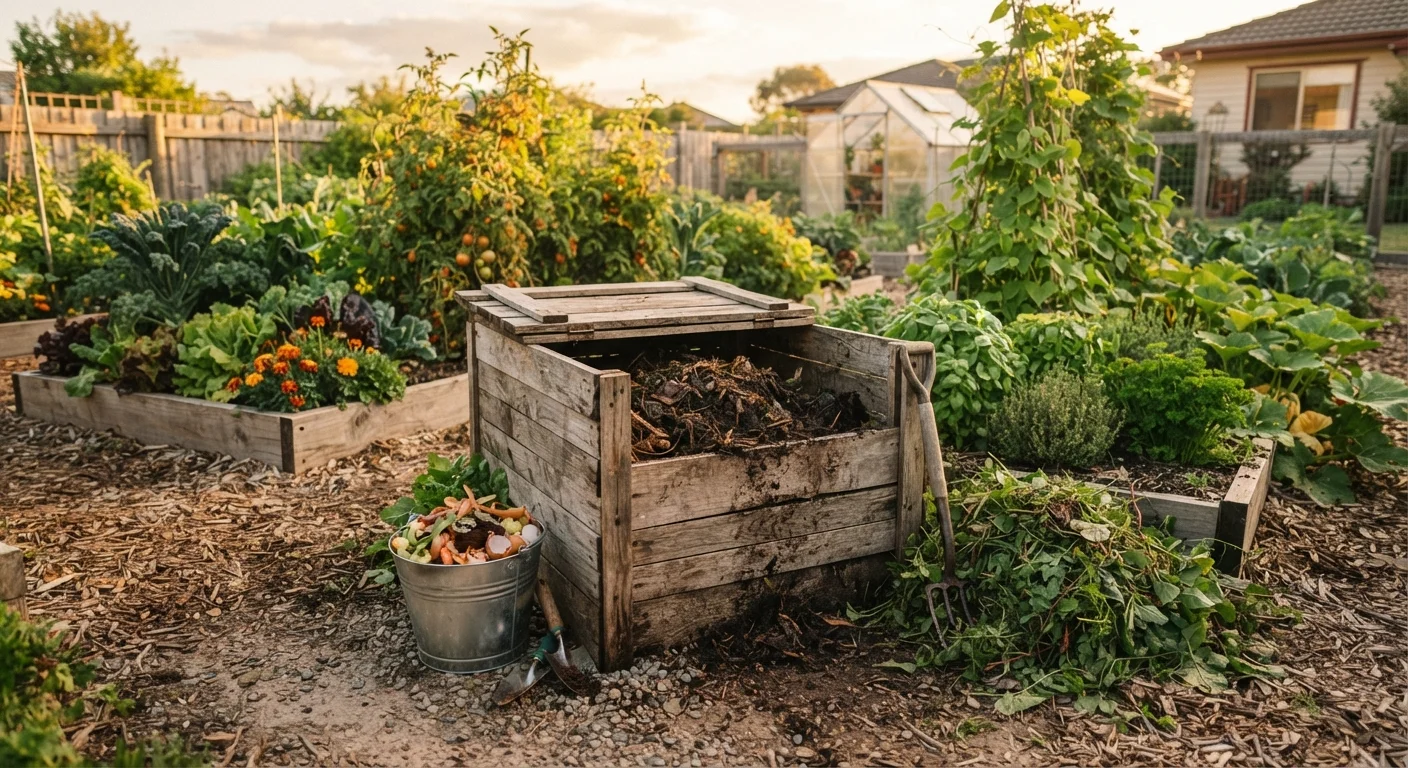
Photo: ReadersChronicle.com | Your Comprehensive Learning Destination editorial
—— In This Article
Key Takeaways
- Compost is free to make and dramatically improves soil health over time.
- Balance 'greens' (nitrogen-rich) with 'browns' (carbon-rich) in roughly a 1:3 ratio by volume.
- Most kitchen scraps except meat and dairy are safe to compost at home.
- Moisture and airflow are the two levers that control how fast your pile breaks down.
- Finished compost looks like dark, crumbly soil and smells earthy, not rotten.
- Even a small pile can produce usable compost within 2-6 months with regular attention.
Why Composting Makes Financial and Garden Sense
Bag after bag of bagged garden soil and fertilizer adds up quickly. Composting short-circuits that expense entirely by converting what you'd otherwise throw away - vegetable peels, coffee grounds, yard clippings - into a rich soil amendment that feeds plants, improves drainage, and supports beneficial organisms underground.
The benefits aren't just financial. Compost builds long-term soil structure in a way that synthetic fertilizers can't replicate. Plants grown in compost-amended soil tend to be more resilient, because healthy soil biology buffers against drought, disease, and nutrient deficiencies. If you're starting a vegetable garden on a tight budget, homemade compost may be the single best return on your time all season.
30%
Of household waste that is compostable
The U.S. EPA estimates that food and yard waste together make up about 30% of what we throw away, all of which could be composted instead.
2-6 months
Typical time to finished compost
An actively managed pile with regular turning and proper moisture can yield usable compost in as little as 2 months; passive piles take 6-12 months.
$0
Cost of homemade compost
Beyond any one-time bin or tool cost, homemade compost is produced entirely from materials you already generate at home.
What to Add (and What to Keep Out)
Composting works through a balance of greens (nitrogen-rich materials) and browns (carbon-rich materials). You need both. Too many greens and the pile turns slimy and smells. Too many browns and decomposition nearly stalls.
Greens to Add
- Fruit and vegetable scraps
- Coffee grounds and paper filters
- Fresh grass clippings
- Plant trimmings and spent flowers
- Eggshells (they decompose slowly but add calcium)
Browns to Add
- Dry leaves
- Cardboard torn into small pieces (remove tape)
- Paper bags and newspaper (black ink only)
- Straw and dried plant stalks
- Paper towels (unbleached)
What to Leave Out
- Meat, fish, bones, and dairy - attract pests and create odor
- Oils and cooked food with fats
- Pet waste - can carry pathogens
- Diseased plants - disease can survive and spread
- Invasive weeds that have gone to seed
Avoid These Inputs to Prevent Pest Problems
Meat, dairy, cooked foods with fats, and pet waste should never go into a home compost pile. These materials attract rodents and other pests, create persistent odors, and can introduce pathogens. Stick to raw fruit and vegetable scraps, yard waste, and dry paper-based materials for a trouble-free pile.
The gardening myths that waste your time and money covers some common misconceptions about compost inputs - including why dumping coffee grounds everywhere isn't the shortcut many gardeners assume.
Choosing a Composting Method
There's no single right setup. The method you choose should match your space, the volume of material you generate, and how much attention you want to give it.
Open Pile or Bin
The simplest approach: pile materials in a corner of your yard, or contain them in a basic wooden or wire bin. This works well for most households and requires almost no upfront cost. Decomposition takes longer (6-12 months), but the labor is minimal.
Tumbler Composter
A sealed drum on a frame that you rotate to aerate the pile. Tumblers tend to produce compost faster and deter pests more effectively than open piles. The tradeoff is upfront cost and a limited capacity.
Worm Bin (Vermicomposting)
Red wiggler worms break down kitchen scraps into a concentrated, nutrient-dense castings (worm compost). Worm bins work indoors, making them suitable for apartments or small homes without yard space. They require a modest investment in worms and a bit more monitoring of moisture and temperature.
Keep a small lidded container on your kitchen counter to collect scraps between trips to the pile - it removes friction from the habit and keeps your kitchen tidy.
The biggest barrier to consistent composting is inconvenience; reducing the number of trips to the bin dramatically improves follow-through for most households.
Chop or shred materials before adding them - smaller pieces decompose significantly faster because they expose more surface area to microbial activity.
Surface area is a primary driver of decomposition speed; torn cardboard and chopped scraps can break down weeks faster than whole pieces.
Whatever method you choose, a small, consistent habit - dropping scraps in a container and emptying it every few days - makes the process nearly effortless.
How to Build and Manage Your Pile
Start with a 4-6 inch layer of browns on the ground to absorb moisture and promote airflow from the base. Add a layer of greens, then repeat, loosely aiming for a 3:1 brown-to-green ratio by volume. Water the pile if it feels dry - it should be about as damp as a wrung-out sponge, not soggy.
Aeration is the other key variable. Turning the pile with a pitchfork or shovel every one to two weeks introduces oxygen, which accelerates decomposition and prevents the anaerobic (airless) conditions that produce bad odors. A pile that gets turned regularly can produce finished compost in as little as 2-3 months.
If you'd rather take a hands-off approach, a cold or passive pile that isn't turned will still produce compost - it just takes longer (often 9-12 months). Both strategies work; the choice is simply a matter of how quickly you want results.
Speed Up Your Pile with One Simple Habit
Every time you add kitchen scraps (greens), toss in an equal or larger volume of dry leaves or torn cardboard (browns) on top. This keeps your ratio balanced automatically without any measuring. A bag of dry leaves collected in fall can supply your browns needs for an entire year.
For more context on how soil biology connects to composting, see our guide on soil fundamentals every new gardener needs to know.
Troubleshooting Common Compost Problems
Most compost problems trace back to one of three things: too much moisture, too little airflow, or an imbalanced ratio of greens to browns.
| Problem | Likely Cause | Fix |
|---|---|---|
| Smells like ammonia | Too many greens | Add browns; turn the pile |
| Smells rotten or like eggs | Too wet, not enough air | Turn pile; add dry browns |
| Not decomposing | Too dry or too many browns | Add water; add greens |
| Pests attracted | Food scraps exposed | Bury scraps in center of pile |
| Pile is cold in winter | Microbial activity slows in cold | Insulate with straw; be patient |
Diseased Plants Belong in the Trash
Unless your pile consistently reaches internal temperatures above 130-140°F - which requires careful management and monitoring - it may not get hot enough to kill plant pathogens or weed seeds. When in doubt, bag diseased plant material and put it in your curbside yard waste bin rather than risk spreading problems through your garden.
Using Finished Compost in Your Garden
Finished compost smells earthy - like forest floor - and is dark, crumbly, and uniform in texture. You shouldn't be able to identify the original materials. If parts of the pile aren't fully broken down, screen them out and return those bits to an active pile.
How to Apply It
- Garden beds: Spread 1-3 inches across the surface and work it into the top few inches of soil before planting.
- Established plants: Topdress around plants as a mulch layer, keeping it a few inches away from stems.
- Potted plants: Mix up to 25% compost into potting mix. Pure compost alone can compact and hold too much moisture in containers.
- Lawn: Spread a thin layer (about a quarter inch) over grass - this is called topdressing - and rake it in.
Compost doesn't replace all fertilizer needs in every garden, but it meaningfully reduces how much you need over time. As covered in our guide to tending a thriving garden without overcomplicating it, consistent inputs like compost do more lasting good than expensive amendments applied sporadically. And if you garden in containers, our container gardening guide explains how to use compost effectively in pots without waterlogging your plants.
“The nation that destroys its soil destroys itself. Forests are the lungs of our land, purifying the air and giving fresh strength to our people.”
— Franklin D. Roosevelt, 32nd President of the United States, in a 1937 letter to state governors on soil conservation

Home Editorial Team
Home Editorial Team is the collective byline for our editorial team and contributor network. Articles published under this byline or an editorial pen name are researched, written, and reviewed according to our editorial standards for clarity, consistency, and independence before publication.
View author profile