
Grout and Caulk in Wet Areas: Why They Fail and How to Reapply Them
Deteriorating grout and caulk around tubs and showers let moisture into walls. Learn to spot failure early and reseal these surfaces yourself.
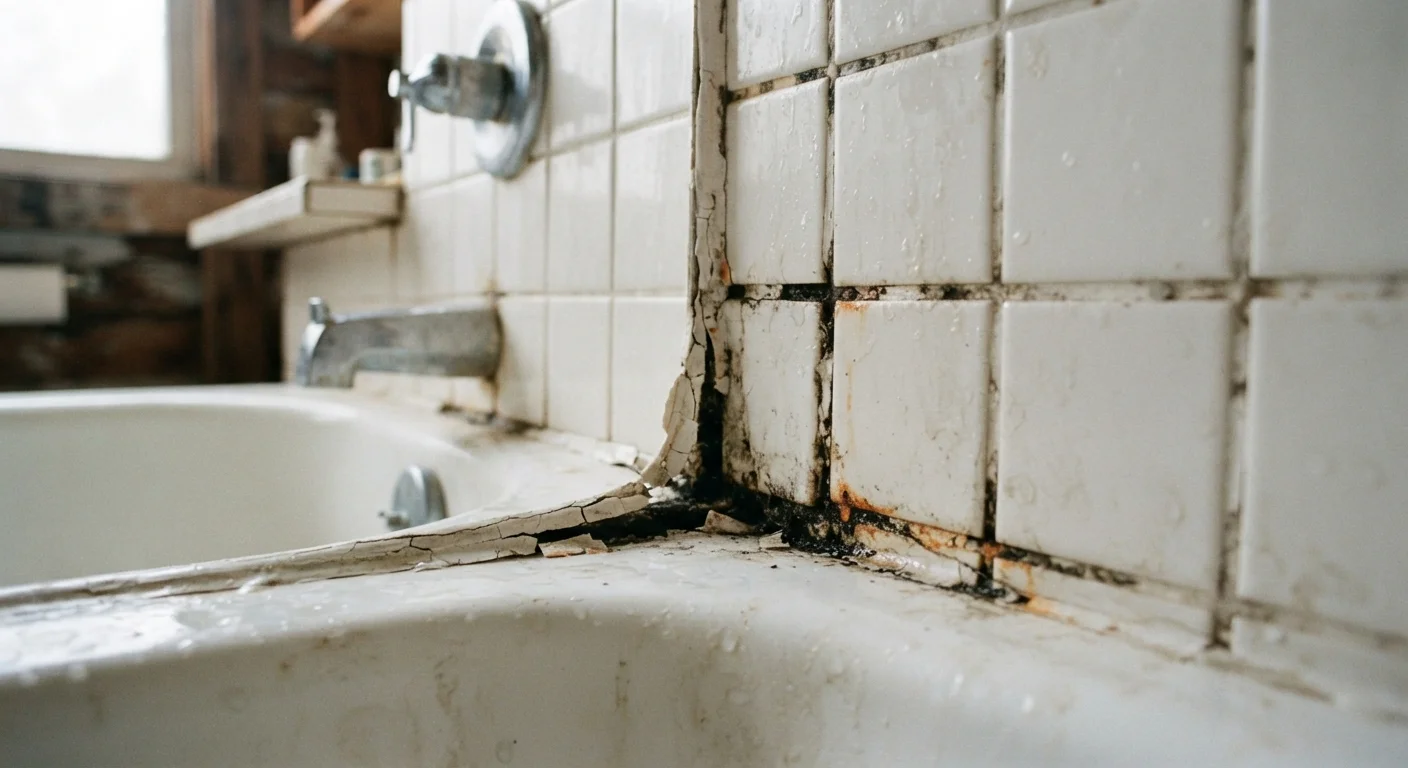
Photo: ReadersChronicle.com | Your Comprehensive Learning Destination editorial
—— In This Article
Key Takeaways
- Grout is rigid and porous; caulk is flexible - wet areas need both in the right places.
- Cracking, discoloration, and soft spots are early signs moisture is already penetrating.
- Complete removal of old material is essential before reapplying grout or caulk.
- Allow new caulk to cure fully - typically 24 hours - before any water exposure.
- Twice-yearly inspection helps catch failure early and avoid costly wall or subfloor damage.
Why Grout and Caulk Fail in Wet Areas
Grout and caulk serve different purposes, and understanding the difference is the first step toward fixing them correctly. Grout is a cement-based filler used between tiles. It is rigid and, unless sealed, somewhat porous - meaning it can absorb water over time. Caulk is a flexible, waterproof sealant applied where surfaces meet at joints that experience movement, such as where a tub meets a tile wall or where walls meet the floor.
In wet areas like showers and tub surrounds, both materials are under constant stress. Daily temperature swings cause surfaces to expand and contract slightly. Soap, body oils, and cleaning products break down material over time. Mold and mildew grow in porous or cracked areas, accelerating deterioration. And in older homes, grout was sometimes applied in corners where flexible caulk should have been used instead - a mismatch that almost guarantees cracking.
The result: gaps form that allow moisture to work behind tiles and into the wall cavity. What looks like a surface cosmetic problem can become structural damage - rotted drywall, damaged subfloor, or mold growth inside walls. That is the same mechanism at work when gutters fail and send water into walls - once moisture finds a path, the damage compounds quietly.
Never Caulk Over Old Caulk
Applying new caulk directly on top of old, failing caulk is one of the most common DIY mistakes. The new layer bonds to the degraded old material rather than to the tile or tub surface, and will peel away in months. Always remove all existing caulk down to the bare substrate before reapplying. This extra step is what separates a fix that lasts from one that needs redoing every season.
Common failure signs include: white or yellow discoloration along grout lines, soft or crumbly grout, visible gaps at caulk joints, black mold at the tub-wall seam, or caulk that has peeled away from one or both surfaces. If you notice any of these, plan to address them within a few weeks.
What You'll Need
Gather your materials before starting. Having everything on hand avoids mid-project trips to the store and helps you work while surfaces are dry.
Grout saw or oscillating multi-tool with grout blade
Removes old or damaged grout from between tiles without chipping tile edges.
Caulk removal tool or plastic scraper
Lifts and removes old caulk from joints without scratching tub or tile surfaces.
Utility knife
Cuts away stubborn caulk residue from edges after mechanical removal.
Rubber grout float
Presses grout into tile joints evenly and removes excess at the correct angle.
Caulk gun
Provides controlled, consistent pressure when applying a bead of caulk.
Sponge and bucket
Wipes grout haze from tile faces during cleanup while keeping water off fresh grout lines.
Caulk finishing tool or wet fingertip
Smooths the caulk bead into a clean, concave profile for better adhesion and appearance.
Grout sealer
Applied after grout cures to reduce porosity and extend the life of the new grout.
What you will need
Step-by-Step: Removing and Reapplying Grout and Caulk
Work through these steps in order. Rushing or skipping the removal phase is the most common reason resealing fails prematurely. For additional guidance on why caulk fails and how application technique matters, see why caulk keeps cracking and what to do differently.
Inspect the full area
Before removing anything, examine every joint in the tub or shower surround. Run your finger along caulk lines and press lightly on grout. Note where material is soft, cracked, discolored, or missing. Taking a photo gives you a useful before reference. If mold is present on the surface, it can typically be addressed during cleaning - but if it appears to go into the wall, consult a professional before proceeding.
Remove old caulk completely
Use a plastic scraper or a dedicated caulk removal tool to lift the old caulk away from the joint. Work slowly along the length of the seam. Follow up with a utility knife or oscillating tool to cut away any residue stuck to the tile or tub surface. Mechanical removal alone rarely gets everything - apply a caulk remover product to stubborn residue, wait the time specified on the label, and scrape again.
Remove damaged grout
Use a grout saw (a handheld tool with a carbide blade) or an oscillating multi-tool fitted with a grout removal blade to carefully cut out damaged grout lines. You do not need to remove grout that is still hard, fully adhered, and free of cracks or mold. Target visibly crumbled, discolored, or porous areas. Remove material to a depth of about 1/8 inch so new grout has something to bond to.
Clean and dry all surfaces
Vacuum out all grout dust and debris from lines and joints. Wipe down tile and tub surfaces with a mildew-killing cleaner or a diluted bleach solution (follow product label instructions). Rinse thoroughly and allow the area to dry completely - at least 24 hours with ventilation, or longer if grout lines feel cool or damp to the touch. New grout and caulk will not adhere properly to wet or dusty surfaces.
Apply new grout
Mix unsanded grout (for joints 1/8 inch or narrower) or sanded grout (for wider joints) according to package directions. Use a rubber grout float held at a 45-degree angle to press grout firmly into the lines, working diagonally across the tile surface. Remove excess by dragging the float across the tiles. Let the grout set for the time indicated on the package - typically 15 to 30 minutes - then clean haze off tile faces with a damp sponge. Rinse the sponge frequently and avoid over-wetting grout lines.
Apply new caulk
Once grout has cured (check the package - typically 24 to 72 hours), apply 100% silicone or siliconized latex caulk rated for kitchen and bath use at all corner joints and along the tub-wall seam. Cut the caulk tube tip at a 45-degree angle to match the joint width. Apply steady, even pressure on the caulk gun as you draw a continuous bead along the joint without stopping. Immediately smooth the bead with a wet fingertip or a caulk finishing tool in a single stroke. Remove tape if used, and wipe away any excess before it skins over.
Allow full cure before use
Allow caulk to cure completely before running water in the area. Most bath caulks require at least 24 hours; 100% silicone products may need up to 48 hours. Check the product label for specifics. Keep the bathroom ventilated during this time. Rushing this step is one of the most common reasons a fresh caulk job fails early.
Silicone vs. Latex Caulk in Wet Areas
100% silicone caulk offers the strongest moisture resistance and flexibility, making it the most durable choice for tub and shower joints. Siliconized latex caulk is easier to apply and clean up with water, and performs well in most home bathroom conditions. Avoid standard acrylic latex caulk in fully wet areas - it is not designed for continuous water exposure and will fail much faster.
If you find soft drywall or significant mold growth behind tile once grout is removed, stop work and consult a professional. Water damage at that stage typically requires more than a reseal. For a sense of what drywall repair involves, see our guide on drywall patching.
Keeping It Sealed: Maintenance Going Forward
After resealing, inspect tub and shower joints at least twice a year - spring and fall work well as reminders. Press lightly along caulk lines with a fingertip. Any give, peeling, or visible gap means it is time to act. Grout lines should feel firm and show consistent color without soft or chalky spots.
Applying a grout sealer annually adds a layer of protection against moisture absorption and staining. Use a small brush to coat grout lines, wipe away excess from tile faces, and allow it to dry fully. This takes about 30 minutes and meaningfully extends the life of your grout.
Not sure whether your tile situation calls for regrouting, caulking, or something more involved? Our article on reading your tile before you spend can help you assess the right path forward without guessing.

Home Editorial Team
Home Editorial Team is the collective byline for our editorial team and contributor network. Articles published under this byline or an editorial pen name are researched, written, and reviewed according to our editorial standards for clarity, consistency, and independence before publication.
View author profile