
Grout, Re-Grout, or Replace: Reading the Tile Before You Spend
Not every damaged tile surface needs a full replacement. Learn how to assess your tile and grout to choose the most cost-effective path forward.
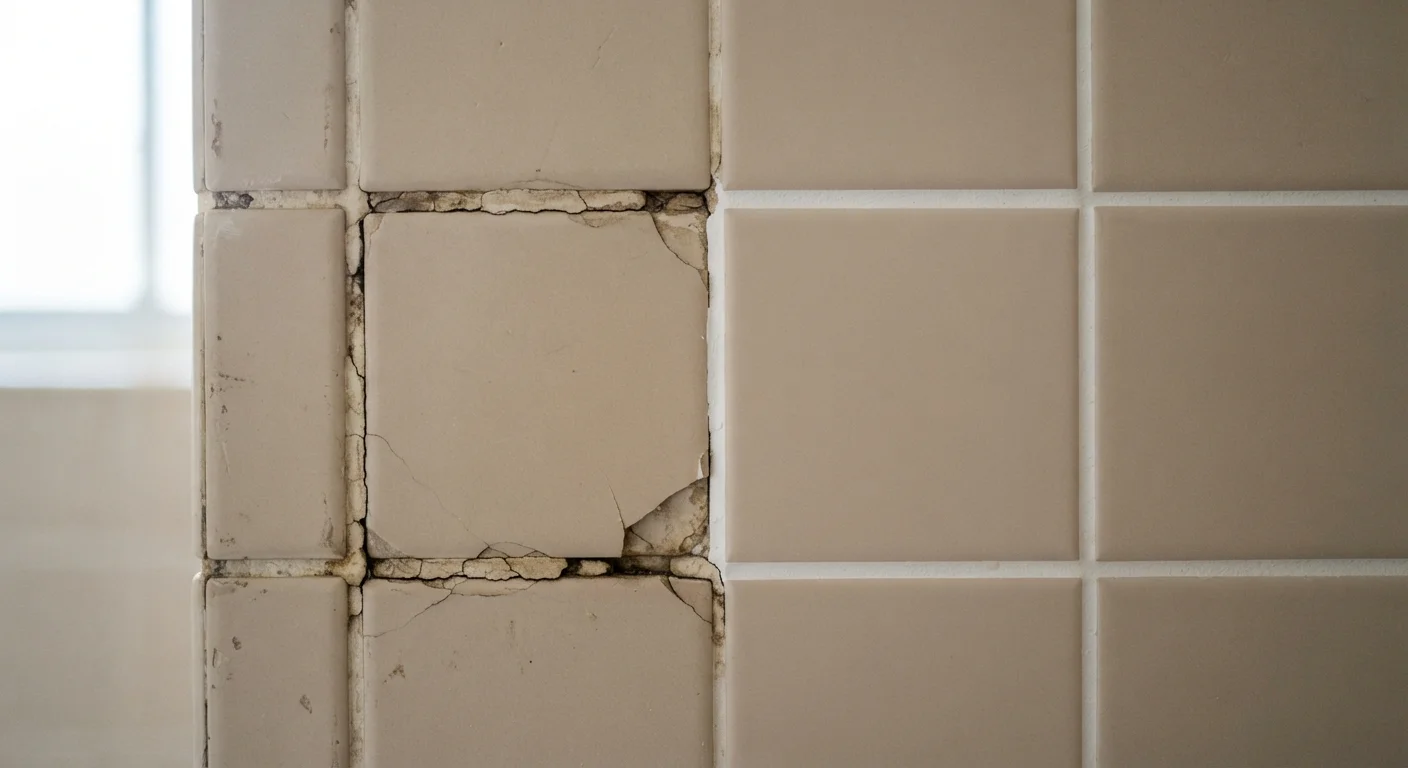
Photo: ReadersChronicle.com | Your Comprehensive Learning Destination editorial
—— In This Article
Key Takeaways
- Discolored or crumbling grout is usually fixable with re-grouting - no tile removal needed.
- Cracked, hollow-sounding, or water-damaged tiles signal a deeper problem that may require replacement.
- Re-grouting is significantly cheaper than full tile replacement, often by hundreds of dollars.
- Assessing the tile substrate (the surface underneath) before spending money can prevent costly surprises.
- Small isolated cracks can sometimes be repaired with grout colorant or epoxy filler without re-grouting.
Start With an Honest Assessment
Before you reach for a trowel or a sledgehammer, spend ten minutes actually reading your tile. Run your fingers along the grout lines. Press gently on individual tiles. Tap them with a coin or knuckle and listen carefully. A solid tile sounds dull and dense; a hollow or clicking sound suggests the tile has debonded from the substrate beneath - a sign of a more serious problem.
Next, look at the grout itself. Is it crumbling, missing, or stained dark with mildew? Those are surface problems, and surface problems are almost always cheaper to fix. Is the grout cracked in a pattern that follows a straight line across multiple tiles? That can indicate movement in the substrate, which no amount of re-grouting will permanently solve.
Finally, check for soft spots in the wall or floor around the tile. Push firmly near the base of a shower wall or around a tub surround. Any flex or give suggests moisture has already penetrated and weakened the backer material - at that point, cosmetic repairs will fail quickly.
Tap Test: Your Free Diagnostic Tool
The tap test costs nothing and takes two minutes. Use a coin or your knuckle to tap each tile in a suspect area. A solid, consistent thud means the tile is bonded well. A hollow click or rattling sound means the tile has separated from the substrate beneath it - that tile, and possibly its neighbors, will eventually crack or lift regardless of what you do to the grout. Mark hollow tiles with painter's tape before deciding how far your repair needs to go.
Grout Repair: The Cheapest Path Forward
If your tiles are firm, sound solid when tapped, and the only issue is deteriorating grout, you're in luck. Re-grouting is a straightforward DIY task that requires basic tools - a grout saw or oscillating tool, new grout, a float, and a bucket of water. Material costs for a standard shower are typically modest, and the job can often be completed in a weekend.
For grout that's still structurally intact but looks dingy or discolored, grout colorant is an even simpler solution. It's painted into existing grout lines, restores color, and adds a sealing layer - no removal necessary. This works best when the grout hasn't cracked or crumbled but has simply darkened over time.
When you do re-grout, remove the old grout to a depth of roughly 2-3 millimeters before applying the new material. Shallow scrapes won't hold. For wet areas like showers, always use sanded or unsanded grout rated for the joint width, and apply a penetrating sealer once it's cured. For a full walkthrough of resealing wet-area joints, see our guide to grout and caulk in wet areas.
| Grout Colorant | Re-Grouting | Spot Tile Repair | Full Tile Replacement | |
|---|---|---|---|---|
| Typical cost range (DIY materials) | Low (under $20) | Low-moderate ($30-$80) | Moderate ($20-$100+) | High ($200-$1,000+) |
| Skill level required | Beginner | Beginner-intermediate | Intermediate | Intermediate-advanced |
| Time to complete | 2-4 hours | One weekend | Half a day | Several days |
| Addresses structural issues | No | No | Partially | Yes |
| Best when grout is... | Stained but intact | Crumbling or missing | N/A | N/A |
| Best when tiles are... | Firm and solid | Firm and solid | 1-3 cracked, solid substrate | Hollow, cracked widely, or wet-damaged |
Spot Tile Replacement vs. Full Replacement
When a tile is cracked or chipped but surrounding tiles are solid and the substrate feels firm, spot replacement is a reasonable option - provided you can source a matching tile. That last part is genuinely tricky. Tiles from even five years ago may be discontinued, and color-matched tiles rarely look identical once grout is applied. Keep this in mind before assuming a single-tile fix will be invisible.
Full tile replacement becomes the practical choice when: multiple tiles are hollow or cracked, the existing substrate (typically cement board or a mortar bed) has been damaged by water, or the layout is so outdated that a targeted repair would look visually mismatched anyway. It's more disruptive and more expensive, but it also gives you the chance to address underlying moisture issues that will otherwise keep causing damage.
If you're weighing a tile overhaul as part of a broader bathroom refresh, cost-stacking your projects can stretch your budget further. Tackling a bathroom refresh on a tight budget covers how to prioritize high-impact changes without gutting the space.
$1,000-$3,000+
Average cost of professional bathroom tile replacement
General contractor estimates vary widely by region, tile type, and labor rates - DIY can reduce material costs significantly.
$30-$80
Typical DIY re-grouting material cost
Covers a standard shower or tub surround using basic tools; professional re-grouting labor adds to this figure.
Making the Call: A Simple Decision Framework
Run through these questions in order before committing to any approach:
- Are the tiles hollow or moving? If yes, inspect the substrate before spending anything on surface repairs.
- Is there visible water damage on adjacent walls, floors, or ceilings? If yes, moisture has already traveled - surface fixes won't address the source.
- Is the damage confined to grout lines only? If yes, re-grouting or colorant is almost certainly sufficient.
- Are fewer than three tiles cracked? If yes, and the substrate is solid, spot replacement may work - if you can source a match.
- Is the damage widespread or the substrate compromised? If yes, budget for full replacement and address the underlying cause at the same time.
Taking this methodical approach costs you nothing and can save you from spending money on a repair that fails within a year. The most expensive mistake in tile work isn't choosing replacement over re-grouting - it's applying a cosmetic fix over a structural problem.
Don't Re-Grout Over a Wet Substrate
If any tiles feel soft underfoot or the wall flexes when pressed, moisture has likely reached the backer material. Re-grouting over a wet or compromised substrate traps that moisture inside the wall, accelerating mold growth and structural damage. Allow the area to dry fully - sometimes for several weeks - or open the wall to assess damage before applying any new grout or sealant. When in doubt, consult a licensed tile contractor before proceeding.

Home Editorial Team
Home Editorial Team is the collective byline for our editorial team and contributor network. Articles published under this byline or an editorial pen name are researched, written, and reviewed according to our editorial standards for clarity, consistency, and independence before publication.
View author profile