
Fixing a Running Toilet: The Three Parts Most Likely to Blame
A running toilet can waste thousands of gallons of water a year. Learn which internal components fail most often and how to address each one.
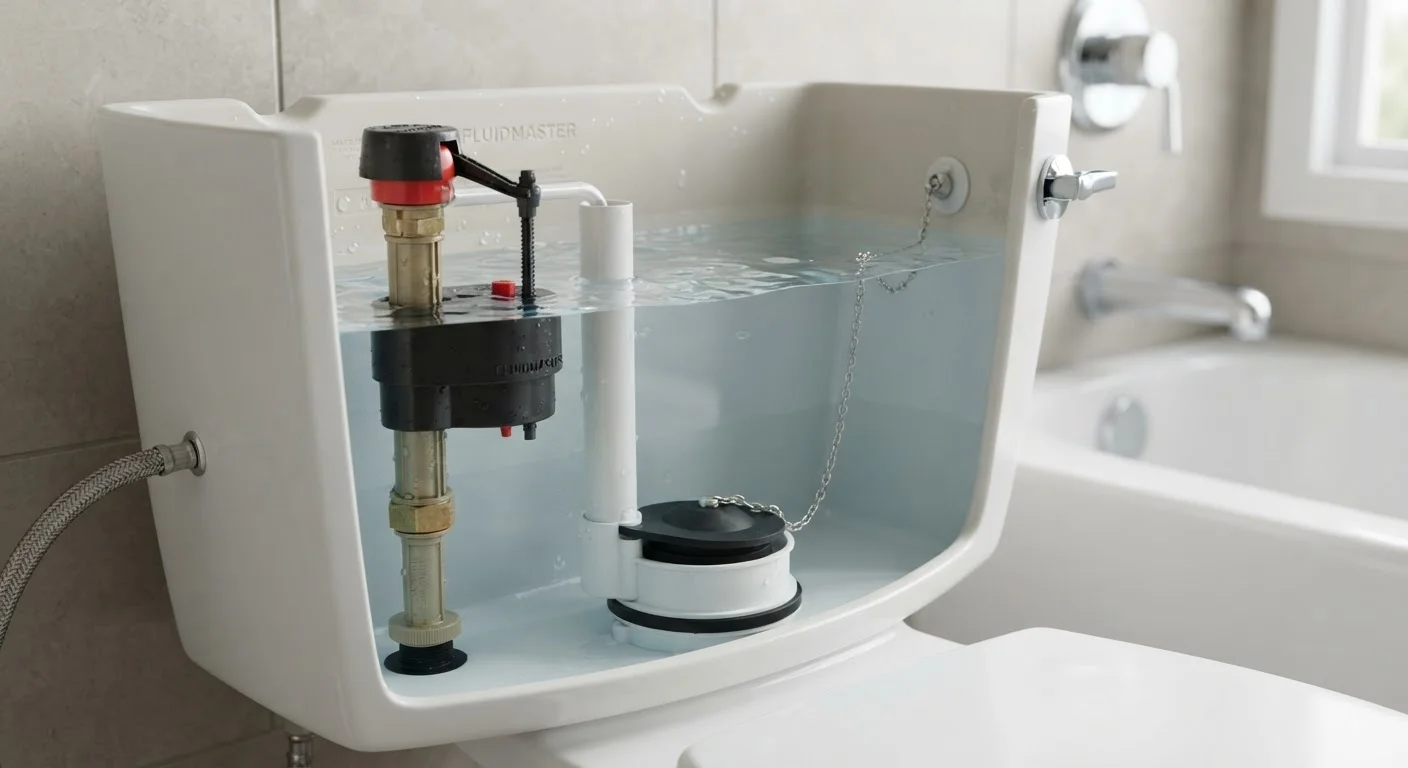
Photo: ReadersChronicle.com | Your Comprehensive Learning Destination editorial
—— In This Article
Key Takeaways
- A running toilet is most often caused by a worn flapper, a faulty fill valve, or a misadjusted float.
- Replacement parts for all three components typically cost under $20 at any hardware store.
- You can diagnose the problem before buying anything by performing a simple food-coloring dye test.
- Ignoring a running toilet can waste thousands of gallons of water annually, raising your water bill noticeably.
- Most repairs require only basic hand tools - no plumber needed for these specific fixes.
Why a Running Toilet Is Worth Fixing Promptly
A toilet that runs continuously - even quietly - can waste between 200 and 1,000 gallons of water per day depending on severity. Over a year, that adds meaningfully to your water bill and contributes to unnecessary water consumption. The good news: in the vast majority of cases, a running toilet is caused by one of three inexpensive internal components, all of which any homeowner can replace with basic tools in under an hour.
This falls squarely into the category of small repairs that pay for themselves quickly. As the cost of deferred maintenance adds up, a $10 flapper ignored for months becomes a noticeably higher utility bill by year's end.
Do the Dye Test Before You Buy Anything
Drop a few drops of food coloring into the tank and wait 10-15 minutes without flushing. If color appears in the bowl, water is leaking past the flapper - and that's where to focus first. This test costs nothing and instantly narrows down the culprit.
Before grabbing any tools, it helps to understand what these three parts actually do. The flapper is the rubber seal at the bottom of the tank that lifts when you flush and drops to hold water for the next flush. The fill valve is the mechanism that refills the tank after each flush and shuts off automatically when the water reaches the correct level. The float is a buoyant device connected to the fill valve that signals when the water level is high enough to stop refilling. When any of these fails or drifts out of adjustment, water runs.
What You'll Need Before You Start
Gather your tools and review the prerequisites before touching the toilet. Having everything on hand saves a mid-repair trip to the hardware store.
What you will need
Adjustable pliers
Used to loosen and tighten water supply line connections and valve lock nuts.
Sponge or old towel
Used to soak up remaining water in the tank after shutting off the supply.
Replacement flapper
The rubber seal at the bottom of the tank - the most commonly replaced toilet part.
Replacement fill valve
Controls the refill of the tank after each flush; replaced when the toilet hisses or overfills.
Food coloring
Used in the dye test to detect flapper leaks without disassembling anything.
Turn Off the Water Supply First
Before opening the tank or removing any parts, locate the shut-off valve behind or below the toilet and turn it clockwise until it stops. Skipping this step can result in water spraying across your bathroom. Flush once after shutting off the valve to empty the tank before you begin work.
Step-by-Step Repair Instructions
Work through these steps in order. If your dye test already confirmed a flapper leak, you can move directly to Step 3 - but don't skip the shut-off step.
Diagnose the problem before touching any parts
Remove the tank lid and set it aside on a soft surface. Listen carefully. A hissing sound usually points to the fill valve. Water trickling into the bowl - visible or audible - usually indicates a flapper leak. Perform the food-coloring dye test to confirm a flapper issue before spending anything.
Shut off the water and empty the tank
Turn the shut-off valve clockwise until it stops. Flush the toilet to drain the tank, then use a sponge to remove any remaining water. This gives you a dry, safe workspace and prevents accidental spills.
Replace a worn flapper
Unhook the old flapper from the ears on either side of the overflow tube and disconnect the chain from the flush handle arm. Bring the old flapper to the hardware store to match the size - they are not universally interchangeable. Snap the new flapper onto the overflow tube pegs, reconnect the chain (leaving about half an inch of slack), and turn the water back on to test.
Adjust or replace the fill valve
If the tank hisses or water keeps running after the tank is full, the fill valve may be worn or misadjusted. Many modern fill valves have an adjustment screw or twist-cap at the top that raises or lowers the shutoff level. If adjusting doesn't help, replacement fill valves are available at hardware stores and typically require only hand-tightening to install: disconnect the supply line, unscrew the lock nut under the tank, swap in the new valve, and reconnect.
Correct a misadjusted float
If water is rising into the overflow tube, the float is set too high. On ball-float designs (an older ball on an arm), gently bend the arm downward or turn the adjustment screw. On cup-float designs (a cylindrical float on the fill valve shaft), pinch the clip and slide the float down the shaft. The water level should sit about one inch below the top of the overflow tube when the tank is full.
Restore water and verify the fix
Turn the shut-off valve back on slowly, let the tank fill completely, and observe. Flush two or three times and watch that the tank refills and stops without hissing. Repeat the dye test if you replaced the flapper to confirm no dye reaches the bowl. Replace the tank lid once everything checks out.
Once confirmed, you've completed a repair that's well within the reach of any budget-conscious homeowner - and you've avoided a plumber call for something that typically costs a few dollars in parts. For more ways to stretch your home improvement budget, see bathroom improvements that don't require gutting the space.
Know When to Call a Plumber
If you notice cracks in the tank, water pooling at the base of the toilet, or signs of mold behind the wall, stop and contact a licensed plumber. These symptoms can indicate more serious problems - such as a failing wax seal or structural damage - that go beyond a simple parts swap. As a reminder, delaying those repairs can turn a minor fix into a costly renovation.
When the Fix Doesn't Hold
If the toilet continues running after you've addressed all three components, look more carefully at the overflow tube height relative to the tank water line, or inspect the flush handle mechanism for a chain that's caught or kinked. In rare cases, hairline cracks in the porcelain tank can cause persistent water loss that no part swap will solve.
It's also worth knowing that some repairs do get misdiagnosed - a belief that a new flapper will always fix a running toilet is one of the home repair myths that cost homeowners real money. If you've replaced all three components and the toilet still runs, consulting a licensed plumber for a professional assessment is the next reasonable step.
This article provides general home maintenance information for educational purposes only. Plumbing systems vary by home age, local code, and water pressure; always verify requirements with a qualified professional and check your local permit requirements before undertaking any work that involves modifications to your home's plumbing supply lines.

Home Editorial Team
Home Editorial Team is the collective byline for our editorial team and contributor network. Articles published under this byline or an editorial pen name are researched, written, and reviewed according to our editorial standards for clarity, consistency, and independence before publication.
View author profile