
Why Your Seedlings Keep Dying Right After Germination
Damping off, overwatering, and poor light are common culprits. Find out what's killing young seedlings and how to give them a better start.
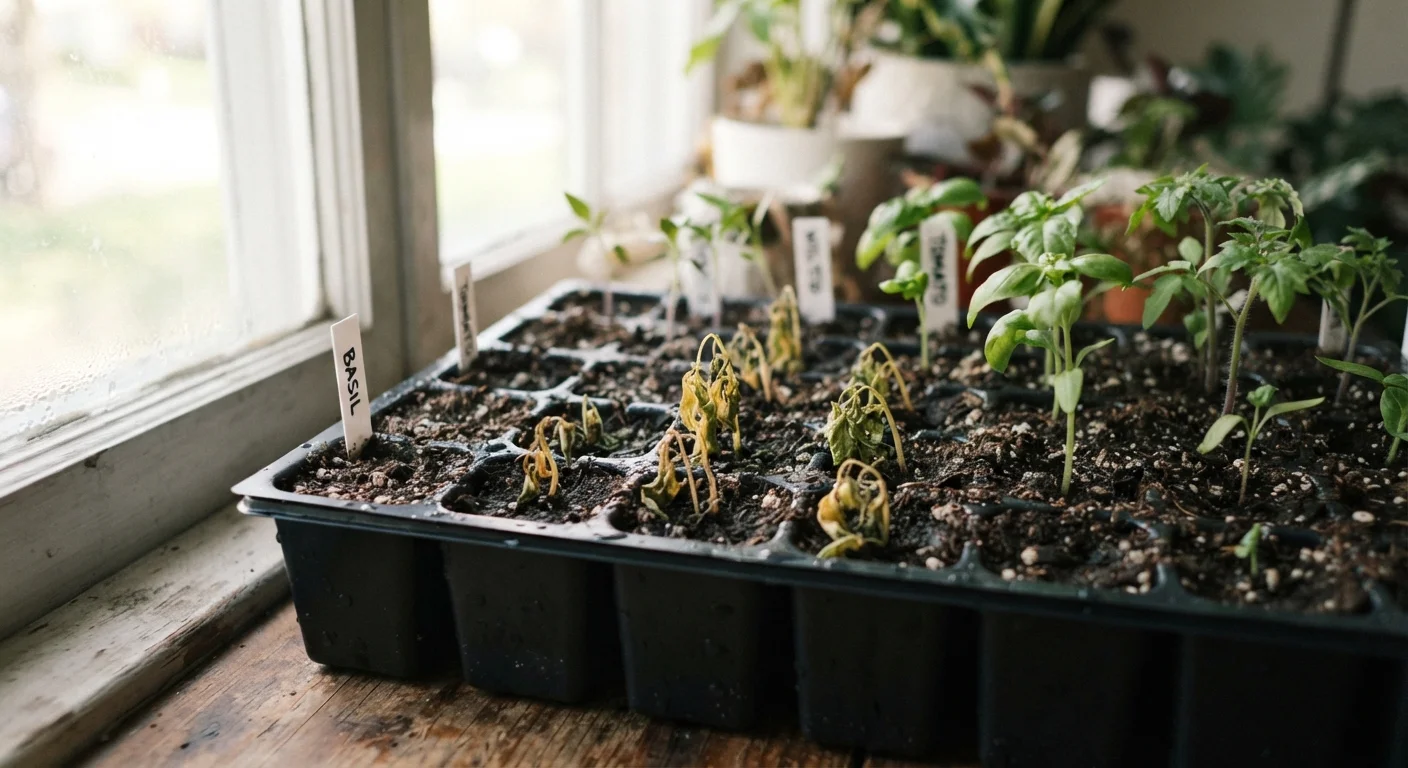
Photo: ReadersChronicle.com | Your Comprehensive Learning Destination editorial
—— In This Article
Key Takeaways
- Damping off - a fungal disease - is the leading cause of seedling collapse after germination.
- Overwatering and poor air circulation create the exact conditions that kill young seedlings.
- Most seedling failures trace back to a handful of fixable mistakes in light, water, and soil choice.
- Budget-friendly solutions like repurposed containers and bottom-watering can dramatically improve survival rates.
What's Really Killing Your Seedlings
You planted the seeds, kept them warm, and watched tiny sprouts appear - then within days they flopped over and died. This experience is frustrating, but it's also almost always explainable. Seedlings are at their most vulnerable in the first one to two weeks after germination, and several very common beginner mistakes hit hardest during that window.
Understanding what goes wrong - and why - is the fastest way to stop losing plants you've already invested time and money in. See our guide to the fundamentals every new gardener needs for the broader picture, but this article zeros in on the specific errors that wipe out seedlings right after they sprout.
Overwatering the germination tray.
Why it happens: Beginners often equate moisture with care, and it feels counterintuitive to let the surface dry slightly between waterings.
Damping off - a fungal collapse that kills seedlings at soil level.
Why it happens: Damping off is caused by soil-dwelling fungi that thrive in cool, wet, poorly ventilated conditions. Reusing old potting mix or dirty containers introduces the pathogens before seedlings even sprout.
Providing insufficient light after germination.
Why it happens: Many beginners place trays on windowsills that look bright but don't deliver the sustained intensity young seedlings need - especially in late winter when day length is short.
Planting seeds too deeply.
Why it happens: Seed packet instructions are easy to misread or ignore, and deeper feels more secure. In reality, many small seeds exhaust their energy reserves before the sprout can reach light.
Starting seeds in the wrong growing medium.
Why it happens: Grabbing whatever soil is on hand - garden dirt, general potting mix - seems practical, but these hold too much moisture and compact around fragile roots.
Skipping thinning after germination.
Why it happens: It feels wasteful to remove seedlings that germinated successfully. But overcrowded seedlings compete for light and airflow, and the weakest ones drag the strongest ones down.
Setting Up for Success on a Small Budget
Fixing seedling problems doesn't require expensive equipment. Most corrections cost little to nothing and involve changing a habit rather than buying a product.
70-90%
Seedling failure rate linked to overwatering
Cooperative Extension programs across the US consistently identify excess moisture as the primary environmental cause of damping off and seedling death in home gardens.
12-16 hrs
Daily light needed by most seedlings indoors
Most vegetable and flower seedlings require substantially more light than a typical winter windowsill provides, making supplemental lighting a common practical necessity.
Bottom-watering is one of the most effective low-cost techniques: set your containers in a shallow tray of water and let the soil absorb moisture from below. This keeps the surface layer drier, directly reducing fungal pressure. A recycled baking pan works perfectly as a tray.
For lighting, a south-facing windowsill can work, but be honest about how many hours of direct sun it actually receives in late winter or early spring. If seedlings are visibly stretching and leaning, the light is insufficient. Repositioning to a brighter spot or rotating containers daily is free. If you're starting many plants indoors, a basic shop-style fluorescent or LED fixture kept a few inches above the seedlings is an affordable and reliable alternative.
Soil matters more than most beginners expect. Garden soil or heavy potting mixes compact in small containers and stay wet too long. A dedicated seed-starting mix - lighter and faster-draining - gives roots the air pockets they need. If you're working with a tight budget, stretching every gardening dollar is entirely doable; a small bag of seed-starting mix goes a long way when used only for germination trays.
Don't Reuse Last Year's Seedling Mix
Old potting or seed-starting mix can harbor fungal spores, pest eggs, and compacted structure that harms new seedlings. Even if last season's mix looks fine, its physical and biological properties have degraded. Starting fresh each season is one of the lowest-cost, highest-impact steps you can take to prevent damping off.
Once you've had a round of seedlings survive to true-leaf stage - when the first set of real leaves appear after the initial seed leaves - you'll know your setup is working. From there, it's mostly a matter of consistency. For help deciding which crops to start indoors versus sowing directly in the garden, see how the two approaches compare.

Home Editorial Team
Home Editorial Team is the collective byline for our editorial team and contributor network. Articles published under this byline or an editorial pen name are researched, written, and reviewed according to our editorial standards for clarity, consistency, and independence before publication.
View author profile