
Fluid Checks Every Driver Should Know
Engine oil, coolant, brake fluid, transmission fluid — here's how to locate, inspect, and understand each one under your hood.
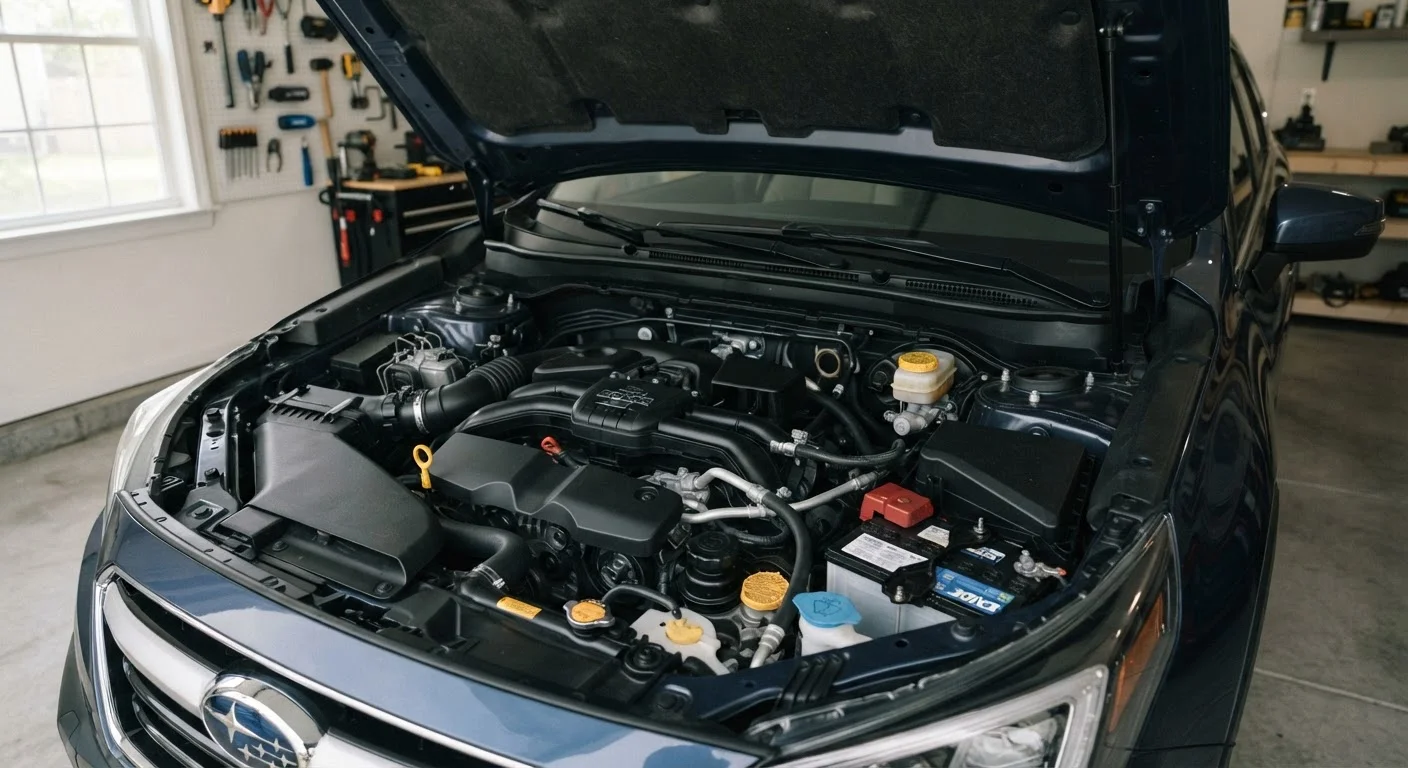
Photo: ReadersChronicle.com | Your Comprehensive Learning Destination editorial
—— In This Article
Key Takeaways
- Checking five key fluids takes less than 20 minutes and costs nothing.
- Low or dirty fluid is often the first warning sign of a developing problem.
- Most fluid checks can be done at home without any special tools or training.
- Your owner's manual is the most reliable source for correct fluid types and intervals.
- Ignoring fluid levels is one of the most common causes of preventable engine damage.
Why These Checks Matter
Vehicle fluids do the quiet, unglamorous work that keeps every major system running: lubricating metal parts, regulating temperature, transmitting force, and protecting against corrosion. When levels drop or fluid degrades, that work goes undone - and the damage compounds silently until something fails visibly.
The good news is that catching fluid problems early is straightforward and free. You don't need a mechanic's lift or a code scanner. Most checks take a few minutes and require nothing more than a rag and your owner's manual. For a plain-language primer on the terminology you'll encounter, see our common car maintenance terms, defined.
If you're newer to vehicle ownership, this check pairs well with the broader overview in Car Maintenance for New Drivers: Where to Begin.
What you will need
What You'll Need
No special tools are required for most of these checks. Keep a small kit - rags, gloves, and a flashlight - in your trunk so you can run through the checks anywhere, not just in your driveway.
Owner's manual
Identifies the correct fluid specifications, dipstick locations, and service intervals for your specific vehicle.
Clean rags or paper towels
Used to wipe dipsticks before re-inserting and to clean up any spills.
Flashlight
Improves visibility inside the engine bay, especially around small reservoir markings.
Nitrile gloves
Protects hands from brake fluid and other chemicals that can irritate skin.
Step-by-Step Fluid Check
Follow these steps in order on a cool engine. The whole sequence typically takes 10-20 minutes.
Park on level ground and let the engine cool
Pull onto a flat surface, shut off the engine, and wait at least 30 minutes before opening the hood. A hot engine can give inaccurate fluid readings and poses a burn risk. Most fluid caps are pressurized when warm.
Check engine oil level and condition
Locate the oil dipstick - usually a brightly colored ring or handle near the engine center. Pull it out, wipe it clean with a rag, reinsert it fully, then pull it out again. The oil film should sit between the two marks (MIN and MAX). Healthy oil is amber-brown. Oil that's nearly black, gritty, or has a milky appearance warrants attention from a mechanic.
Inspect coolant (antifreeze) level
The coolant reservoir is a translucent plastic tank, typically located near the radiator. With the engine cold, check that the fluid level sits between the LOW and FULL marks on the side of the tank. Coolant is usually bright green, orange, or pink depending on the type. A consistently low level may indicate a leak in the system.
Check brake fluid level
The brake fluid reservoir is a small, semi-transparent plastic container near the firewall on the driver's side. The level should fall between MIN and MAX. Brake fluid is clear to light yellow when fresh; dark or murky fluid is a sign it may need to be replaced. A low level can sometimes indicate worn brake pads or a leak - both warrant a mechanic's inspection.
Check power steering fluid (if applicable)
Not all vehicles have hydraulic power steering - many newer cars use electric systems that require no fluid. If yours has a power steering reservoir (check your manual), locate it and verify the level using the dipstick or side markings. Low fluid can cause steering to feel stiff or produce a whining noise when turning.
Check windshield washer fluid
This is the one fluid you can check and top off any time - no need to wait for a cool engine. The washer fluid reservoir is usually labeled with a windshield icon. Use only washer fluid rated for your climate; plain water can freeze in cold temperatures and doesn't clean as effectively.
Make It a Monthly Habit
Running through all five fluid checks once a month takes about ten minutes and can catch small issues before they become costly repairs. A quick visual scan of the engine bay at the same time can reveal leaks, cracked hoses, or loose connections that are much cheaper to fix early. Many drivers tie this habit to a regular calendar day - the first of the month works well.
Transmission Fluid Is Different
Transmission fluid checks vary significantly by vehicle. Some have a dipstick; many modern automatics are sealed units that require a lift and professional inspection. Checking or adding the wrong type of transmission fluid can cause serious damage. Always consult your owner's manual before attempting this check, and when in doubt, leave it to a qualified mechanic.
What To Do If Something Looks Wrong
If a fluid is low, top it off with the type specified in your owner's manual - using the wrong type can cause damage. If a fluid is consistently low between checks, that pattern is more important than the single low reading: it likely signals a leak or internal consumption worth having a mechanic inspect.
Discolored or contaminated fluid - milky oil, dark brake fluid, rusty coolant - is a sign the fluid has degraded or been contaminated and may need to be flushed and replaced rather than simply topped off. Don't just add fresh fluid on top of bad fluid.
Dashboard Lights Don't Replace Fluid Checks
Warning lights are a last resort - your car's sensors don't always detect low fluid levels until a problem is already developing. For example, oil pressure warnings often appear only after pressure has dropped dangerously low. Regular manual checks are a more reliable early-warning system than waiting for a dashboard alert. See our guide to warning lights drivers routinely ignore for context on when those alerts do appear.
Skipping fluid checks consistently is one of the maintenance habits that quietly shorten a car's life. And if you want to understand how oil degradation specifically drives service intervals, our piece on oil change intervals and what the mileage numbers actually mean covers that in detail.

Cars Editorial Team
Cars Editorial Team is the collective byline for our editorial team and contributor network. Articles published under this byline or an editorial pen name are researched, written, and reviewed according to our editorial standards for clarity, consistency, and independence before publication.
View author profile