
What to Consider Before Installing Luxury Vinyl Plank Flooring Yourself
LVP flooring is popular for DIY installs, but subfloor prep and moisture conditions matter more than most tutorials let on. Here's the full picture.
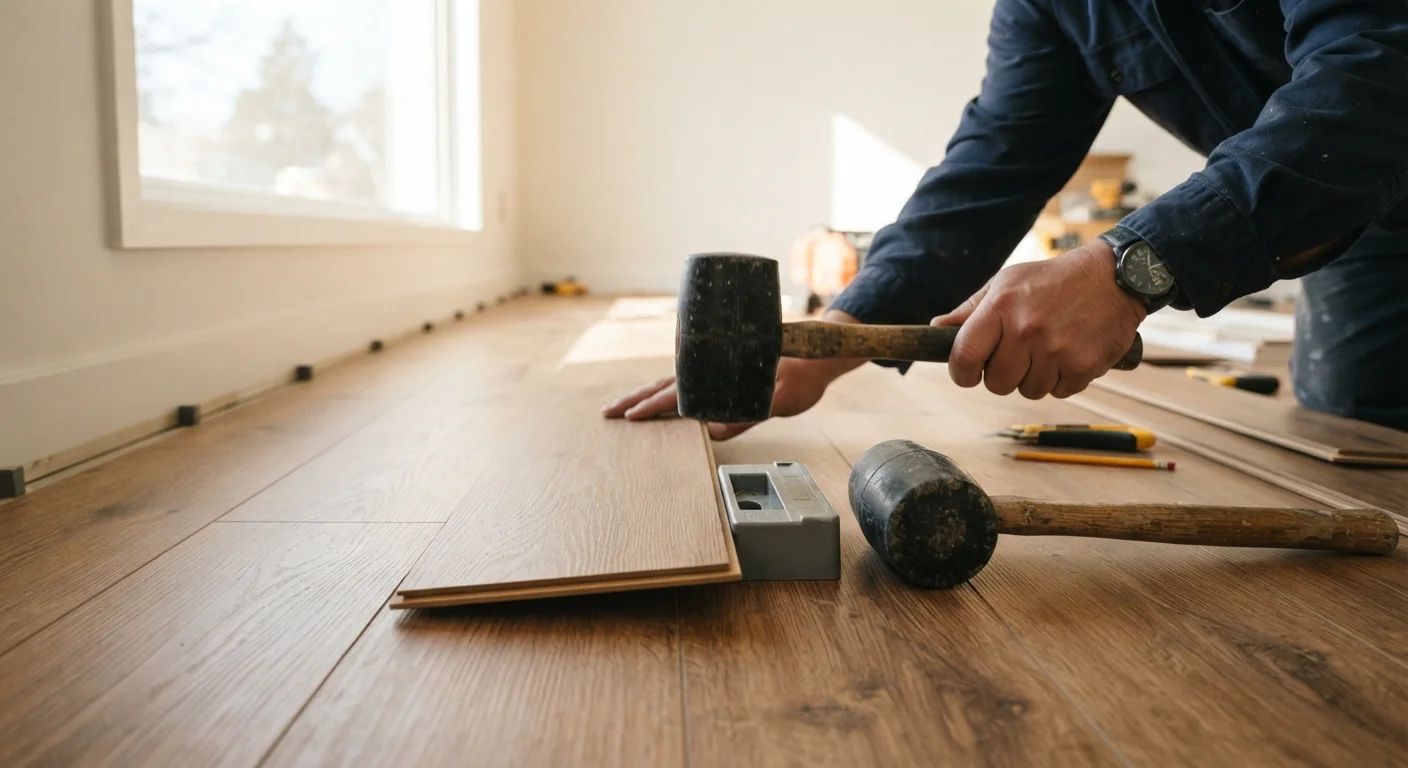
Photo: ReadersChronicle.com | Your Comprehensive Learning Destination editorial
—— In This Article
Key Takeaways
- Subfloor flatness and moisture levels are the most critical factors in a successful LVP installation.
- Floating LVP installs require no glue or nails, making them accessible for most capable DIYers.
- Improper subfloor prep is the leading cause of LVP failures like buckling, gaps, and clicking sounds.
- LVP is not suitable for all subfloor types without additional prep work or underlayment.
- Always purchase 10% extra material to account for cuts, waste, and future repairs.
No special tools or adhesives required
Most click-lock LVP products float over the subfloor with no fasteners. A rubber mallet, tapping block, and utility knife handle the majority of the work.
Significantly lower installed cost than hardwood
Doing the install yourself eliminates labor, which can represent 50% or more of the total project cost for professional flooring installations.
Handles everyday moisture far better than wood
LVP is 100% waterproof at the plank level, making it suitable for kitchens, bathrooms, and basements where real wood flooring would be risky.
Durable surface resists scratches and dents
The wear layer on quality LVP products is designed to withstand pet claws, dropped items, and high foot traffic without visible damage under normal household use.
Floats over most existing subfloors
LVP can often be installed directly over existing concrete, plywood, or even old vinyl flooring (if flat), reducing the demolition and disposal work involved.
Unforgiving of an uneven or wet subfloor
Any deviation from the flatness spec telegraphs through the planks, causing joint stress, creaking, and eventual locking tab failure - often voiding the product warranty.
Expansion gaps must be maintained precisely
Forgetting or underestimating perimeter expansion gaps can lead to buckling in warm months as the floor expands and has nowhere to go - a mistake that requires lifting the entire floor.
Temperature sensitivity limits some applications
LVP should not be installed in spaces with extreme temperature swings - such as uninsulated garages or sunrooms with direct, unfiltered UV exposure - as repeated expansion and contraction degrades performance.
Repairs require matching dye lot
If a plank is damaged after installation, replacing it requires a matching plank from the same production run. Color variation between batches makes this difficult unless you saved leftover material.
Can feel hollow or less substantial underfoot
Without a quality underlayment, floating LVP can sound hollow and feel thin compared to glue-down or nailed hardwood - a common complaint in rooms with open floor plans.
Why LVP Has Become a DIY Favorite
Luxury vinyl plank (LVP) flooring has surged in popularity among homeowners doing their own renovations. It mimics the look of hardwood, handles everyday moisture better than real wood, and doesn't require specialized tools or adhesives in most installations. A standard floating click-lock installation involves snapping planks together over the existing subfloor - no nail gun, no glue, no mortar.
The core appeal is accessibility. Most LVP products come with manufacturer installation guides, and the learning curve is manageable for someone with basic home improvement experience. Costs per square foot are also considerably lower than engineered hardwood or ceramic tile when you factor in labor savings from doing it yourself.
That said, the ease of the install itself can give DIYers false confidence. The parts that determine whether the floor performs well long-term - subfloor prep, moisture assessment, acclimation - happen before a single plank is clicked into place.
The Honest Pros of a DIY LVP Install
Understanding where LVP genuinely delivers helps you decide if it's the right product for your space before you commit.
No special tools or adhesives required
Most click-lock LVP products float over the subfloor with no fasteners. A rubber mallet, tapping block, and utility knife handle the majority of the work.
Significantly lower installed cost than hardwood
Doing the install yourself eliminates labor, which can represent 50% or more of the total project cost for professional flooring installations.
Handles everyday moisture far better than wood
LVP is 100% waterproof at the plank level, making it suitable for kitchens, bathrooms, and basements where real wood flooring would be risky.
Durable surface resists scratches and dents
The wear layer on quality LVP products is designed to withstand pet claws, dropped items, and high foot traffic without visible damage under normal household use.
Floats over most existing subfloors
LVP can often be installed directly over existing concrete, plywood, or even old vinyl flooring (if flat), reducing the demolition and disposal work involved.
10%
Minimum material overage to purchase
Flooring industry guidelines consistently recommend ordering at least 10% extra to account for cuts, waste, and future repairs.
3/16"
Maximum subfloor deviation over 10 feet
Most LVP manufacturers specify this flatness tolerance in their installation requirements; exceeding it typically voids the product warranty.
The Real Cons You Need to Know
No flooring product is perfect, and DIY installation adds variables that professional installers are trained to manage. These are the drawbacks worth weighing honestly before you start.
Unforgiving of an uneven or wet subfloor
Any deviation from the flatness spec telegraphs through the planks, causing joint stress, creaking, and eventual locking tab failure - often voiding the product warranty.
Expansion gaps must be maintained precisely
Forgetting or underestimating perimeter expansion gaps can lead to buckling in warm months as the floor expands and has nowhere to go - a mistake that requires lifting the entire floor.
Temperature sensitivity limits some applications
LVP should not be installed in spaces with extreme temperature swings - such as uninsulated garages or sunrooms with direct, unfiltered UV exposure - as repeated expansion and contraction degrades performance.
Repairs require matching dye lot
If a plank is damaged after installation, replacing it requires a matching plank from the same production run. Color variation between batches makes this difficult unless you saved leftover material.
Can feel hollow or less substantial underfoot
Without a quality underlayment, floating LVP can sound hollow and feel thin compared to glue-down or nailed hardwood - a common complaint in rooms with open floor plans.
Check Your Manufacturer's Warranty Terms
LVP warranties vary considerably by product and are often conditional on following the manufacturer's specific installation instructions, including subfloor prep, moisture limits, and acclimation time. Before purchasing, read the warranty document - not just the marketing summary - so you understand exactly what's covered and what conditions could void it. This is general guidance; your specific product's requirements govern.
Subfloor Prep: The Step Most Tutorials Rush Past
The single most important thing you can do before installing LVP is assess your subfloor carefully. LVP manufacturers typically require the subfloor to be flat within 3/16 of an inch over a 10-foot span. High spots cause planks to rock; low spots create hollow-sounding, flexible areas that stress the locking joints over time.
Check flatness with a long straightedge or chalk line. High spots on concrete can be ground down; low spots are filled with a floor-leveling compound, which needs to cure fully before installation begins. On wood subfloors, squeaky or soft areas should be screwed down or repaired - LVP will not hide a weak subfloor, it will amplify it.
Moisture is equally critical. On concrete slabs, conduct a calcium chloride test or use a relative humidity probe to measure moisture vapor emission. Most LVP products specify a maximum acceptable moisture reading - check your product's documentation. Installing over a slab that's too wet leads to adhesion failures (for glue-down products) or warping and buckling in floating installations.
Allow planks to acclimate in the room at normal living temperature and humidity for the period specified in the manufacturer's instructions - commonly 24 to 48 hours. Skipping this step in a climate-controlled home can cause the planks to expand or contract after installation, creating visible gaps or pressure at the walls.
What to Measure and Buy Before You Start
Accurate material estimation prevents mid-project shortages and ensures dye-lot consistency across the floor. Measure the room's square footage, add at least 10% for cuts and waste, and increase that buffer to 15% for rooms with angled walls or complex layouts.
Beyond the planks themselves, you may need: a moisture barrier (required by some manufacturers when going over concrete), underlayment (often pre-attached to the planks, but not always), transition strips for doorways and room boundaries, and spacers to maintain the expansion gap around the perimeter. That gap - typically 1/4 inch - lets the floor expand and contract without buckling. Base molding or quarter-round trim covers it when you're done.
Tool requirements are minimal: a utility knife or a circular saw with a fine-tooth blade, a tapping block and rubber mallet, a pull bar for the last row, and a tape measure. A miter saw makes angle cuts cleaner but isn't strictly necessary.

Home Editorial Team
Home Editorial Team is the collective byline for our editorial team and contributor network. Articles published under this byline or an editorial pen name are researched, written, and reviewed according to our editorial standards for clarity, consistency, and independence before publication.
View author profile